Are you using LinkPort to source leads on LinkedIn?
Your next challenge would be to convert these leads into opportunities.
You need to engage these leads, build relationships with them, create purchase intent, and then seal the deal.
But doing so manually for multiple leads is time-consuming. Following up with all your leads regularly and on time tends to be a struggle.
This is where a Sales Engagement Platform like Klenty comes in.
Klenty is designed to help sales teams follow up regularly and on time across multiple channels, add that personal touch to every step, and get more meetings booked.
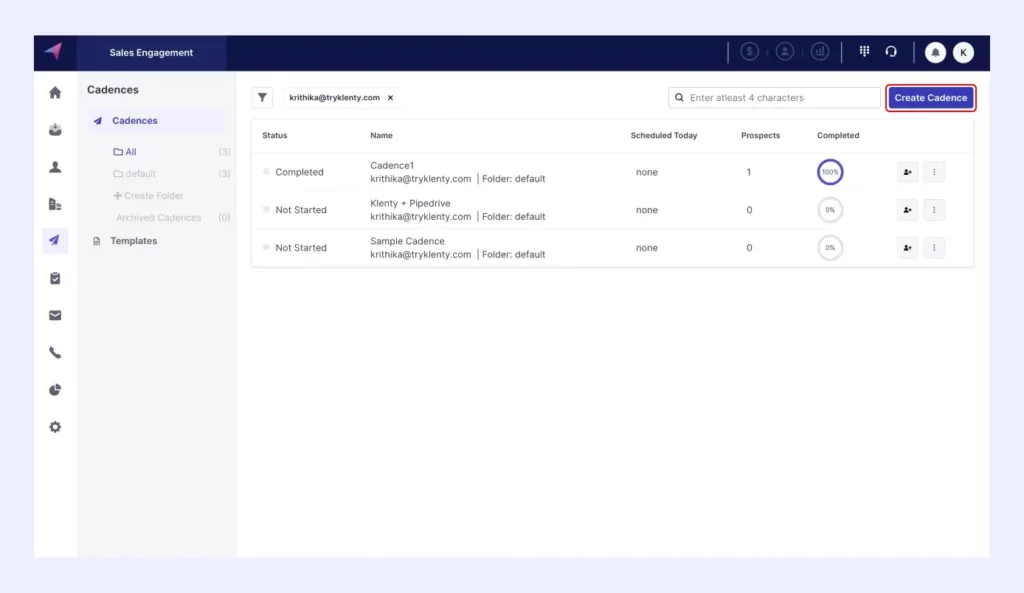
In this blog, we’ll explore 10 different LinkPort + Klenty workflows to make the most out of the leads in your CRM.
Group Your Leads Based on Criteria to Run Personalized Outreach
Grouping your LinkPort leads allows you to segregate them into categories of your choice. And then run highly specific and relevant sequences/messaging for them.
Here’s a simple way to do so:
(For the purpose of this blog, I’m grouping my leads based on which channel I’m using to reach out to them)
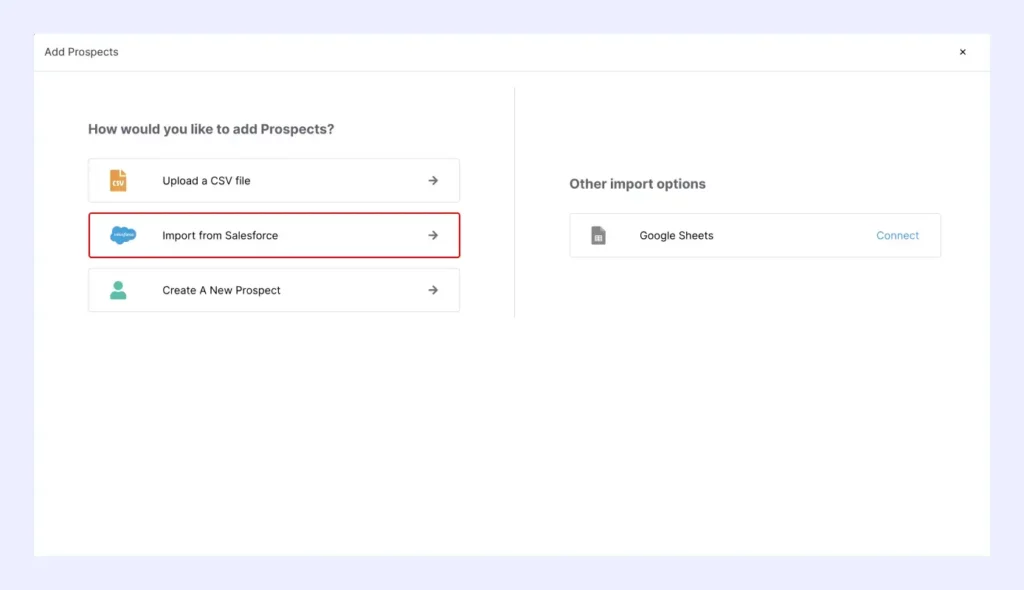
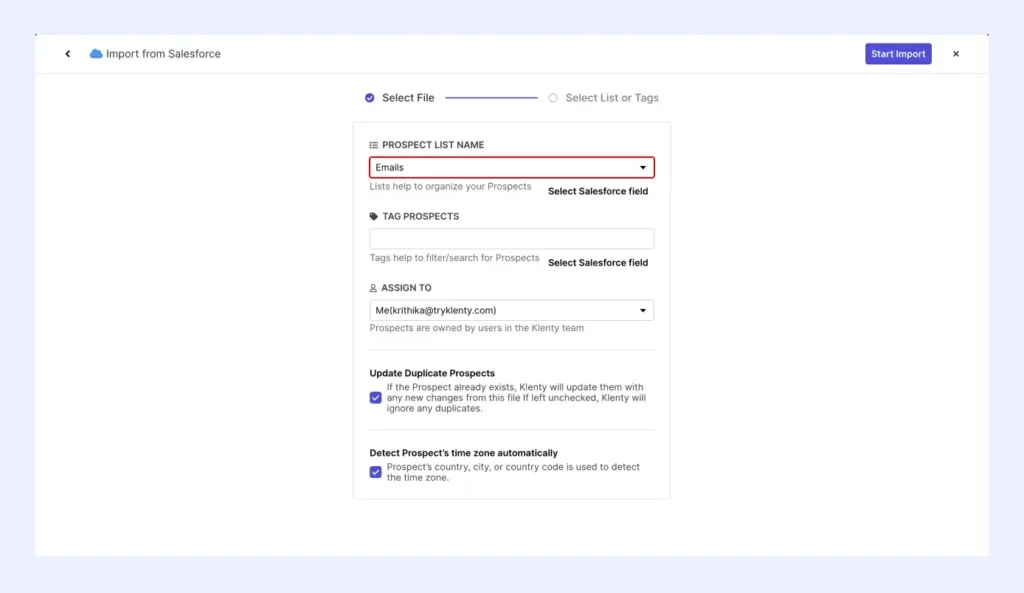
Click on "Add Prospects"
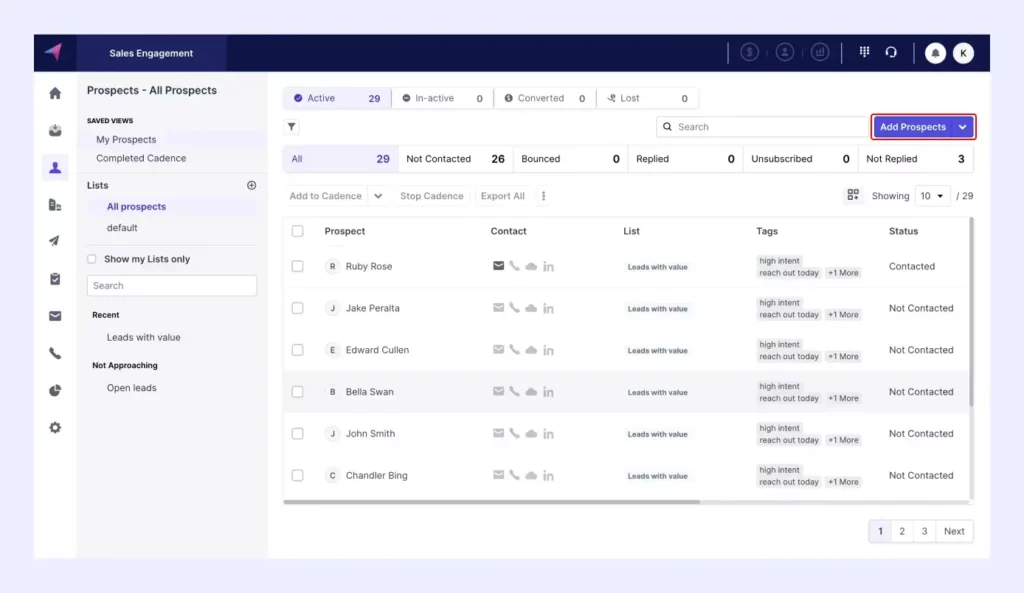
This is where you can import leads from your CRM directly.
Select the list view you want to import.
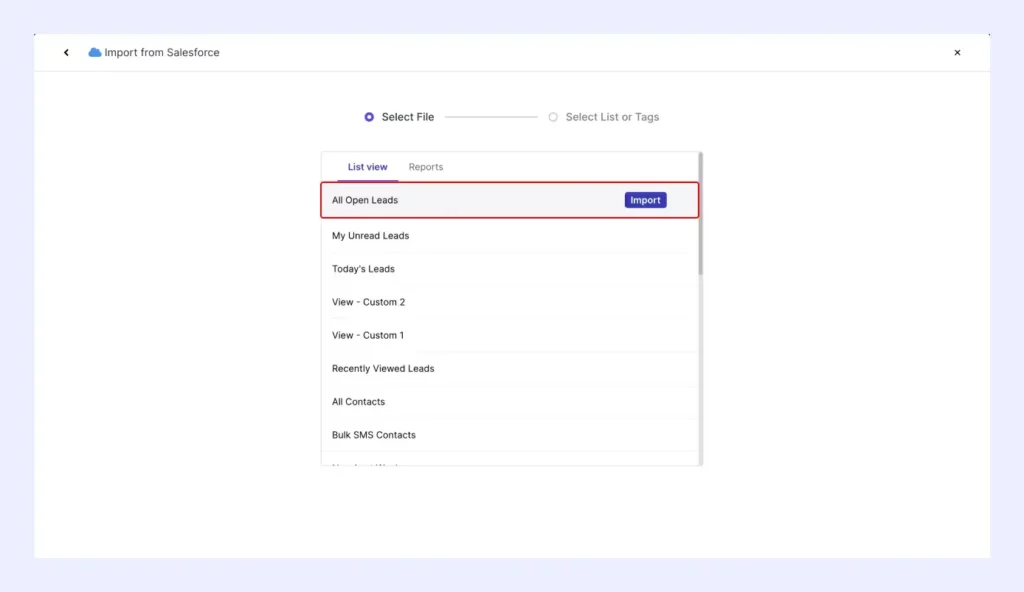
You can either import them directly or create new lists within which they will be stored.
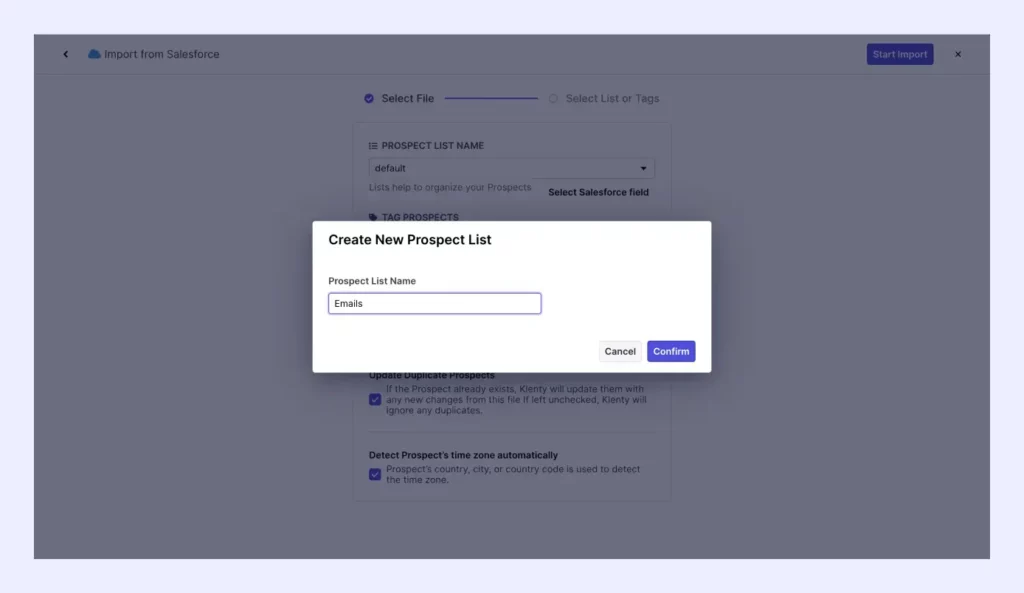
If you choose to create a new list, select "Create New Prospect List."

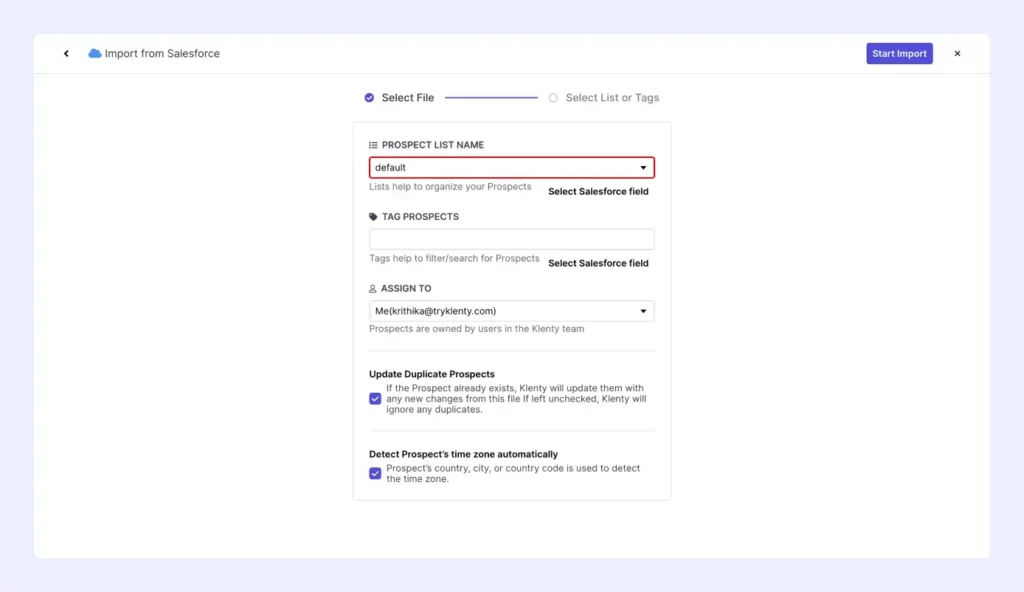
Enter your list name and confirm.
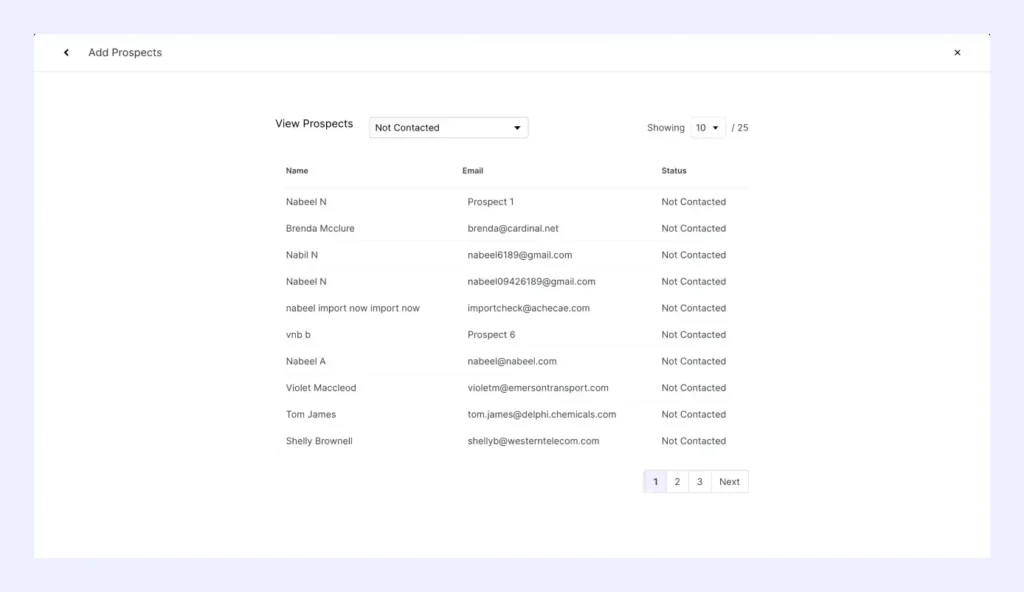
View all the prospects you’ve imported here.
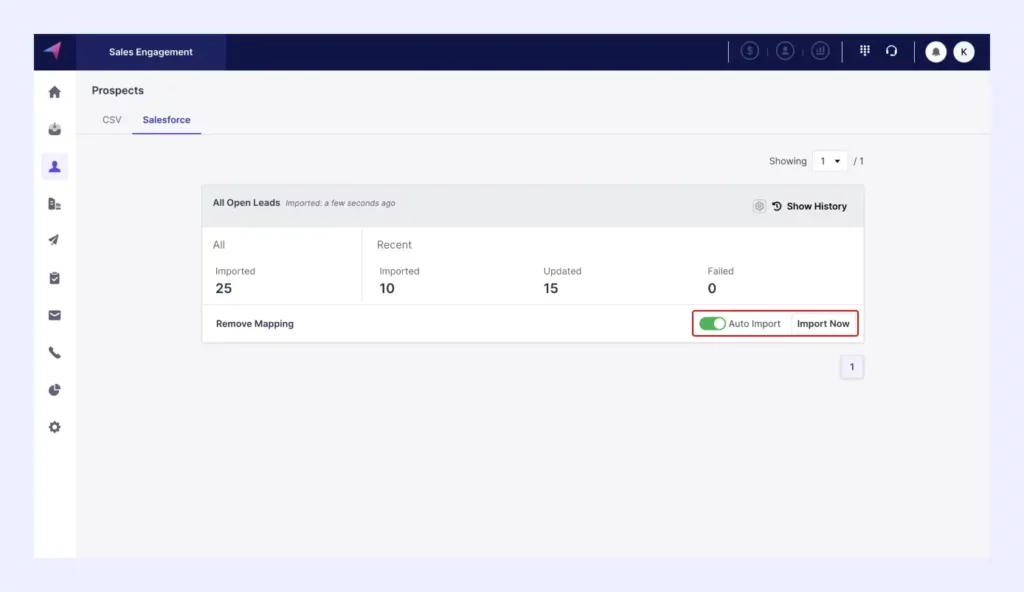
Klenty automatically refreshes and updates any new additions every 3 hours. You just have to toggle ON the auto-import function.
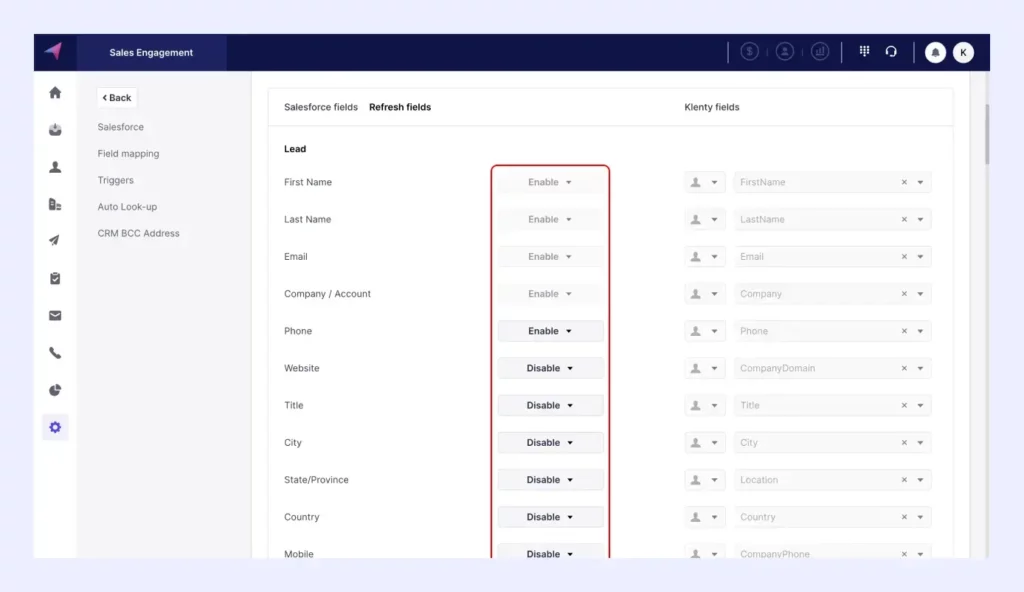
Map All Lead Information to Klenty
Next, bring all the information you got about your leads using LinkPort into Klenty.
Enable your desired fields in the image below, and Klenty automatically maps all your standard and custom CRM fields.
You can then leverage this information to send highly-personalized and relevant messages to your prospects.
Select the CRM field and the corresponding Klenty field for your lead information to be mapped accordingly.
Run Multi-channel Sequences to the Leads You Downloaded from LinkedIn
i) Execute Automated LinkedIn Outreach to Your Leads
LinkedIn has quickly grown to be the third most popular outreach channel. And for good reason, too. It puts a face to your name and establishes a personal connection between you and your prospect.
Most sales teams do LinkedIn outreach either manually or fully automate the process.
But scaling manual LinkedIn outreach is tough. And, LinkedIn detects and bans accounts with automated/bot activity.
Klenty encourages you to practice safe LinkedIn outreach by sending your LinkedIn messages with intervals, personalizing your messages, and notifying you when you hit a certain threshold of LinkedIn tasks.
Here’s how you can semi-automate your LinkedIn outreach with Klenty.
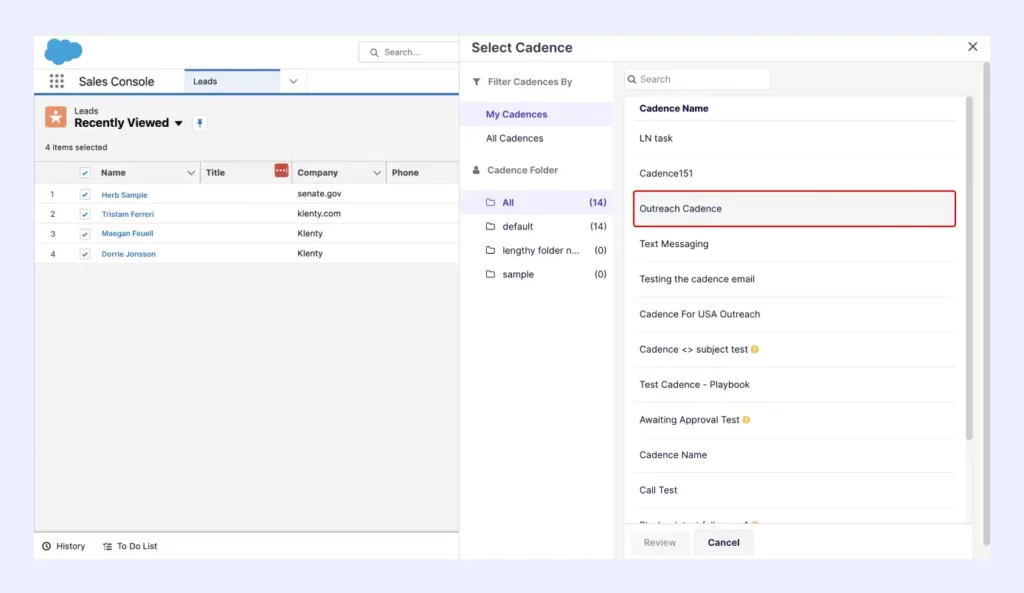
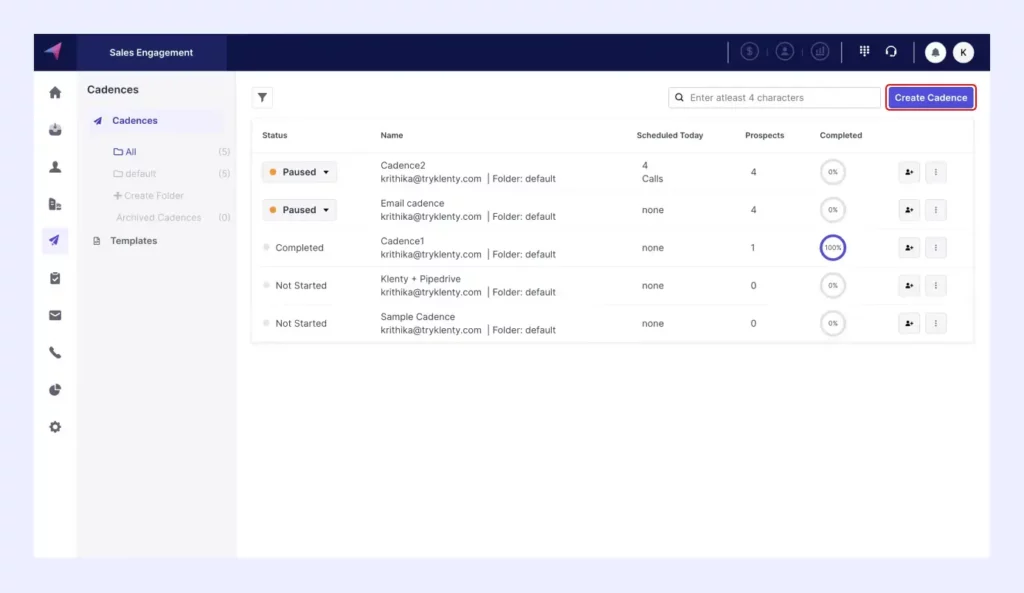
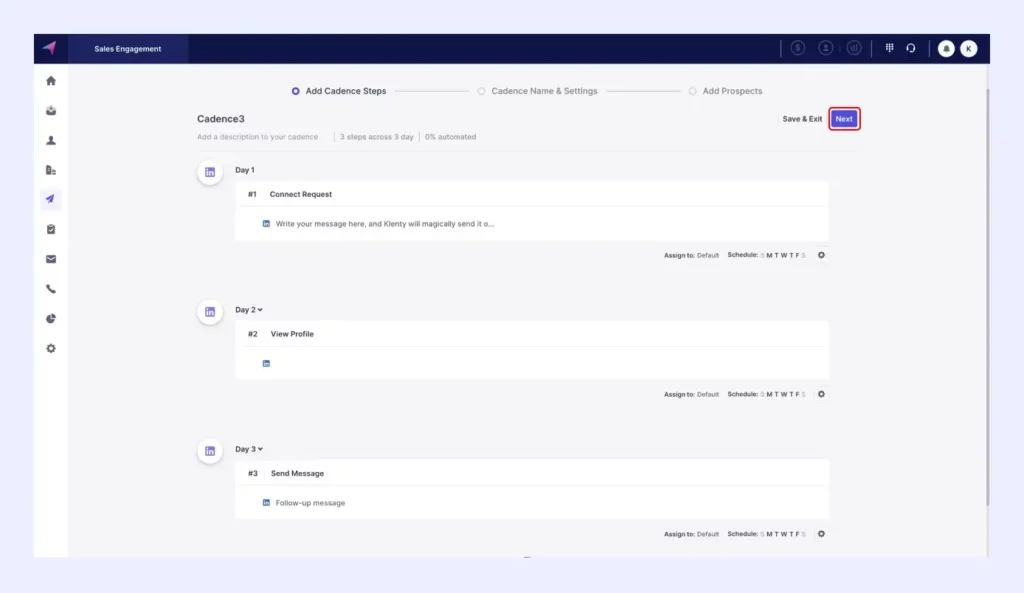
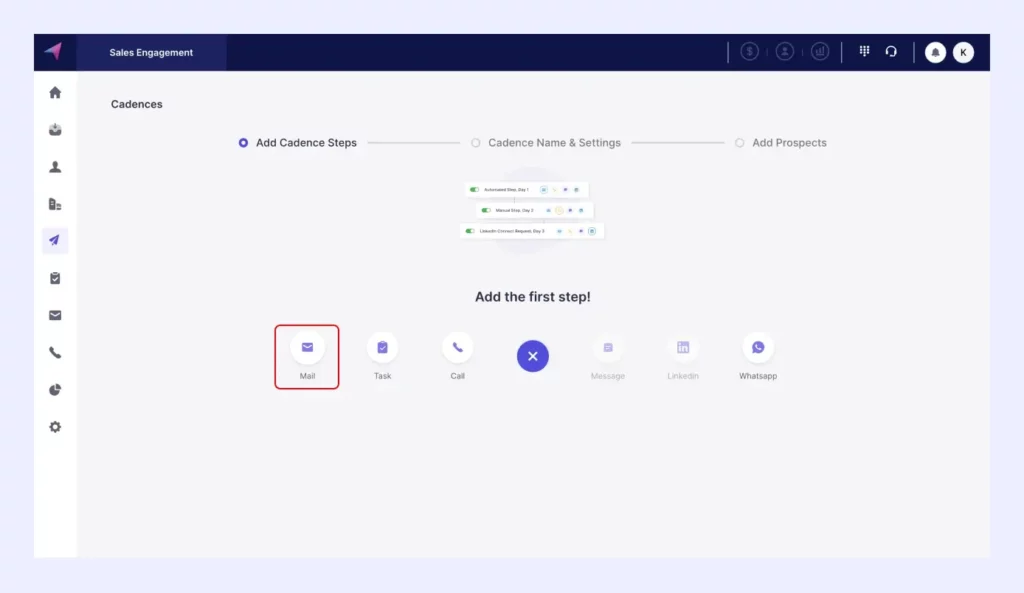
First, you need to create a cadence with LinkedIn steps.
Select LinkedIn from all the channel options available.
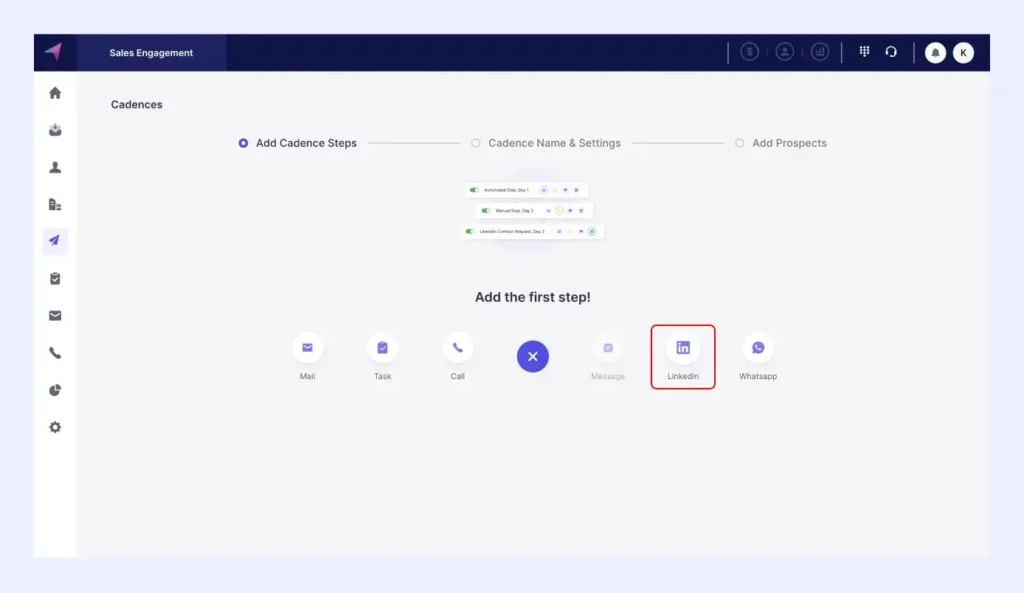
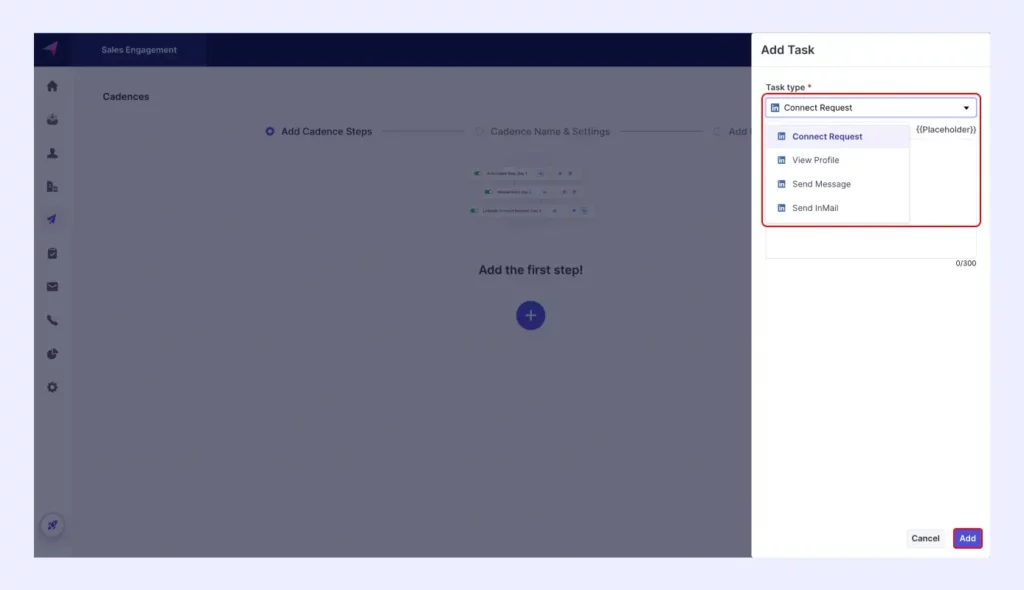
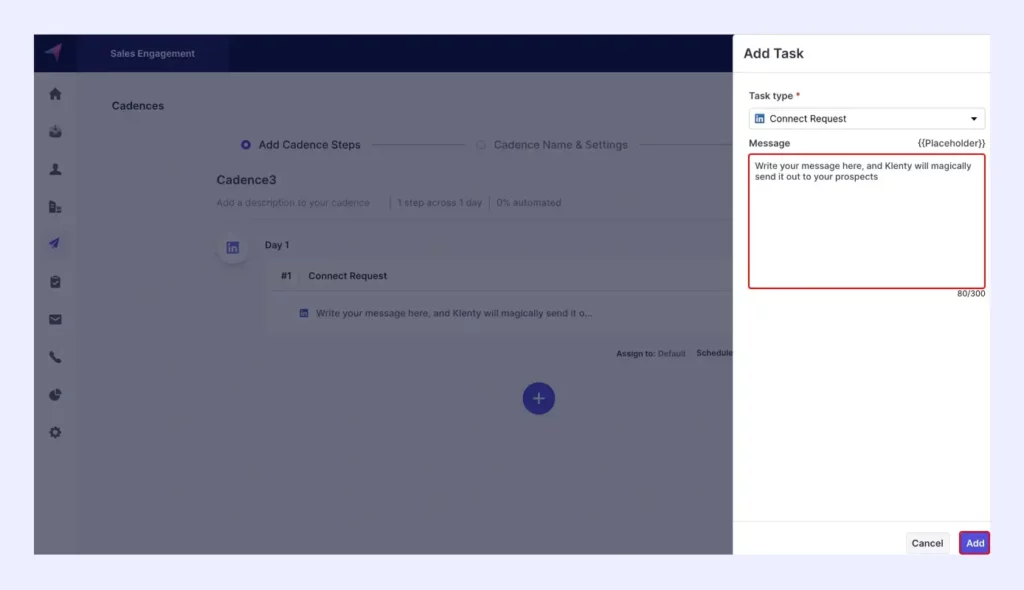
Choose the specific LinkedIn task you have in mind.
Once your tasks are all lined up, click "Next" to add leads into your cadence.
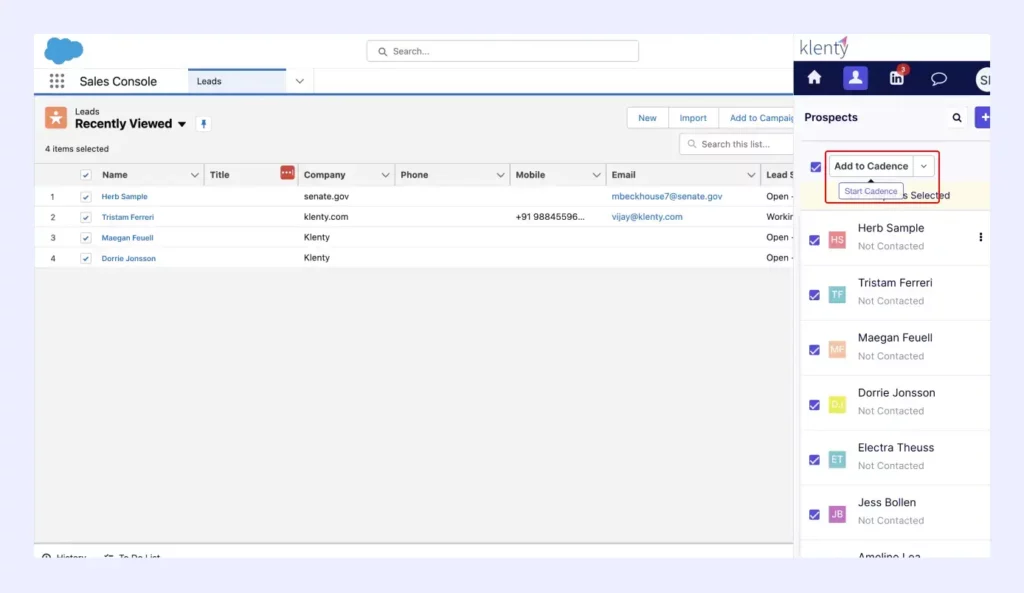
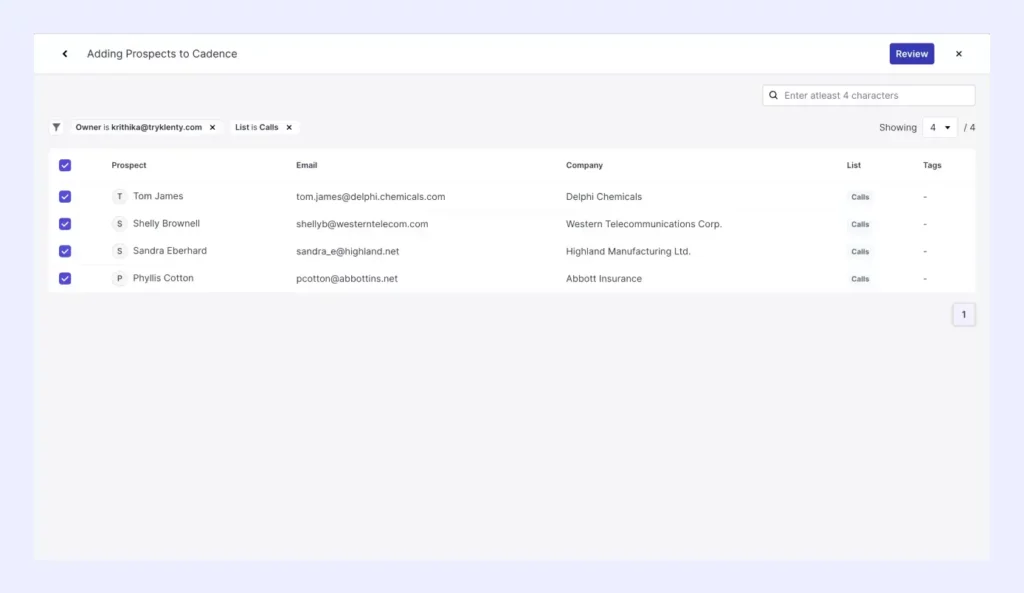
Click on "Select An Existing Prospect"
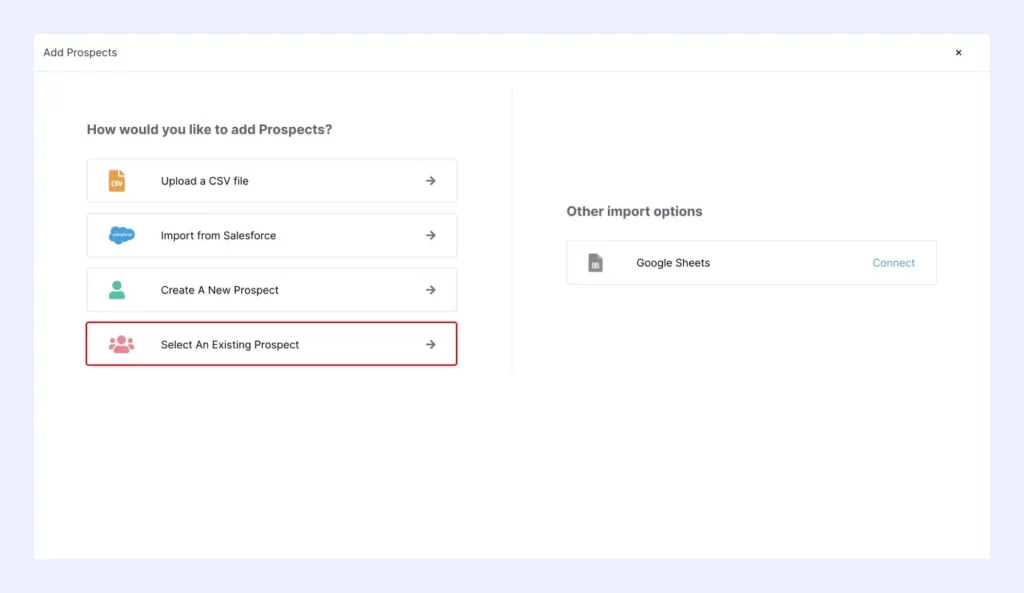
Select the prospect list you want to import.

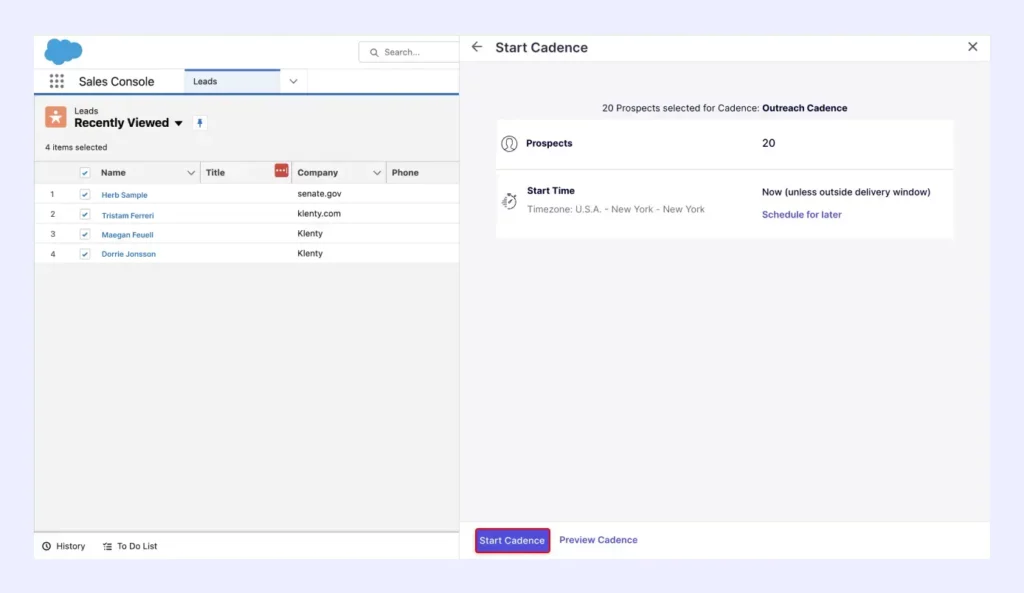
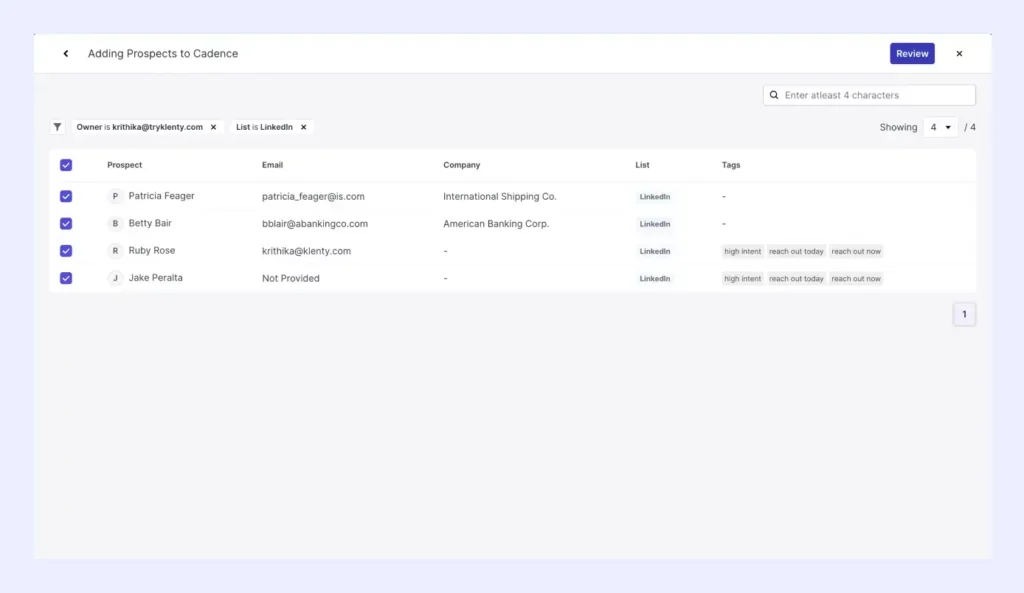
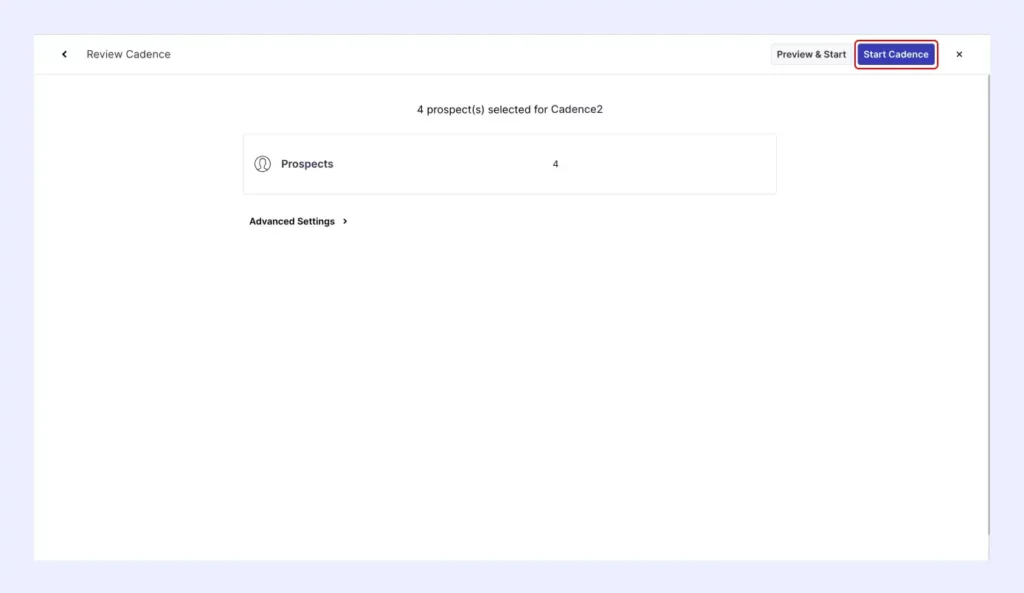
Review and add your prospects next.
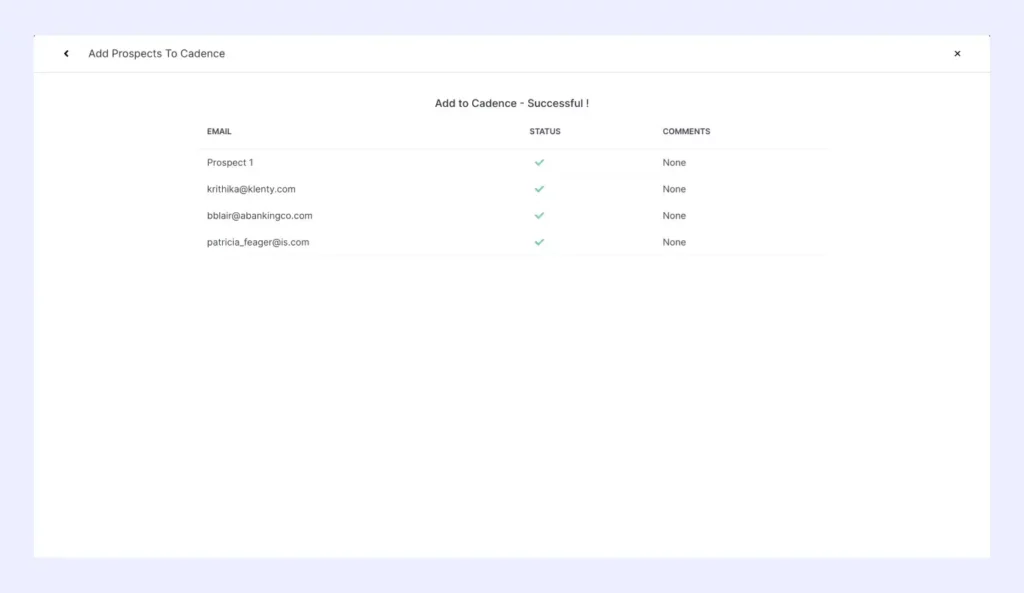
You'll receive a confirmation message saying your prospects were successfully added into the cadence.
Now, start your cadence to tick off all your LinkedIn tasks!
ii) Call Your Prospects Using Klenty Dialer
For cold callers, this is how you can automate your calls.
Create a cadence to get started.
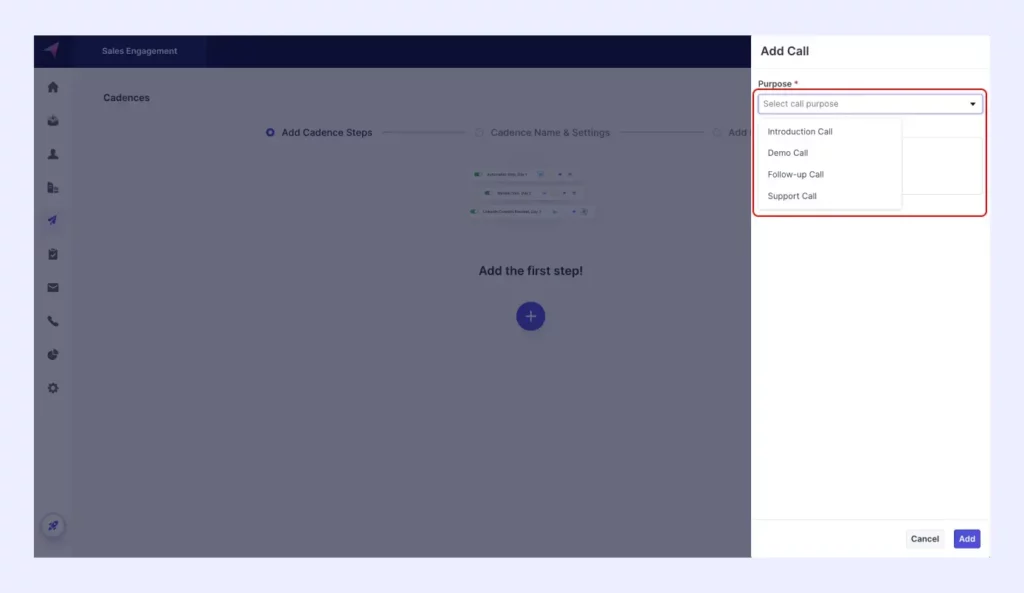
Select "Call' from the multiple channel options available.
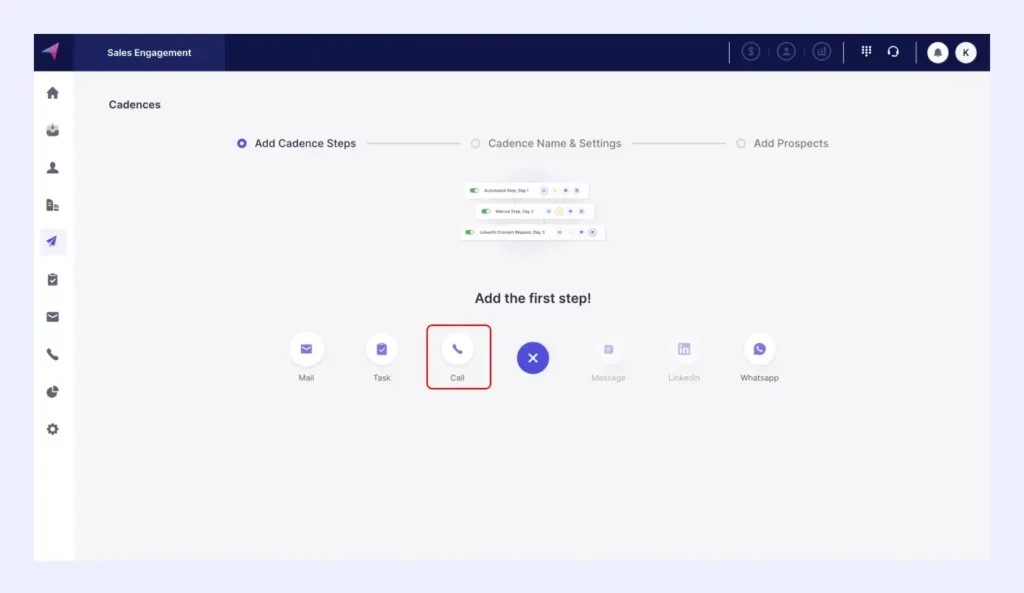
You can choose the type of call you want to add in your cadence.
Add pointers or notes you might want to keep in mind during the call.
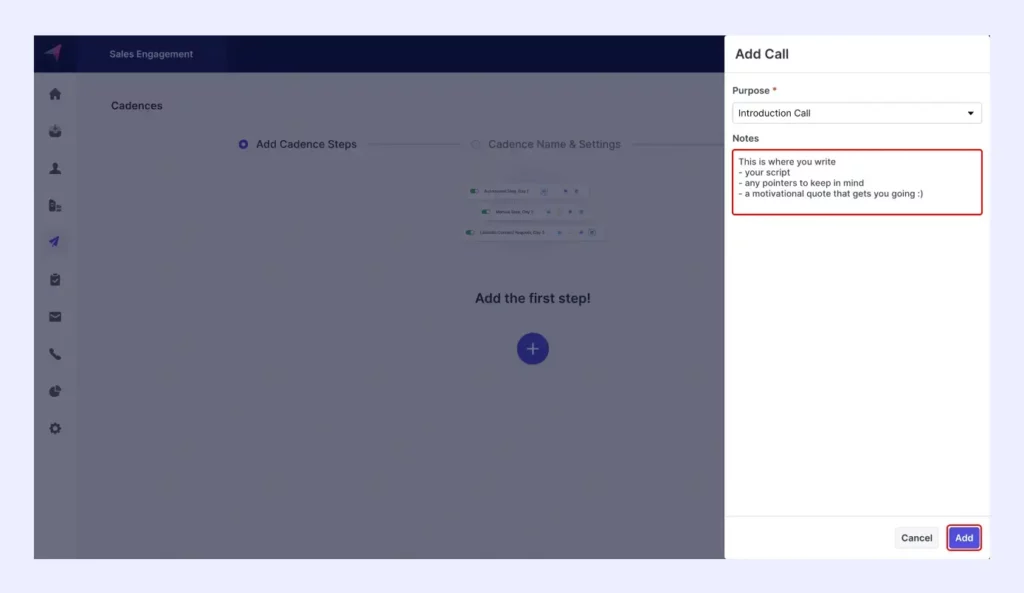
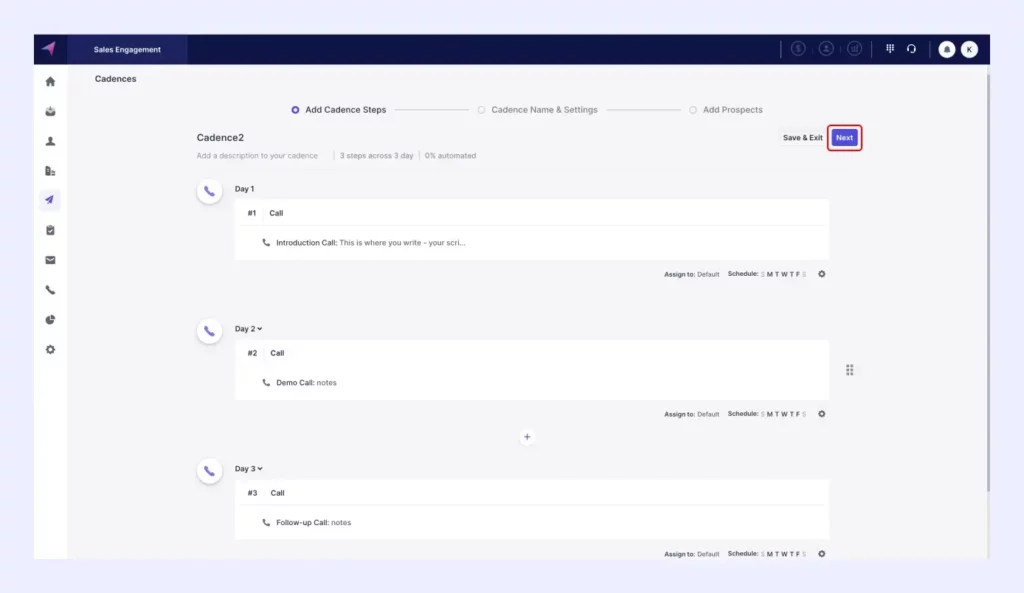
Once all your call tasks are set up, click "Next" to add prospects into the cadence.
Choose "Select An Existing Prospect"
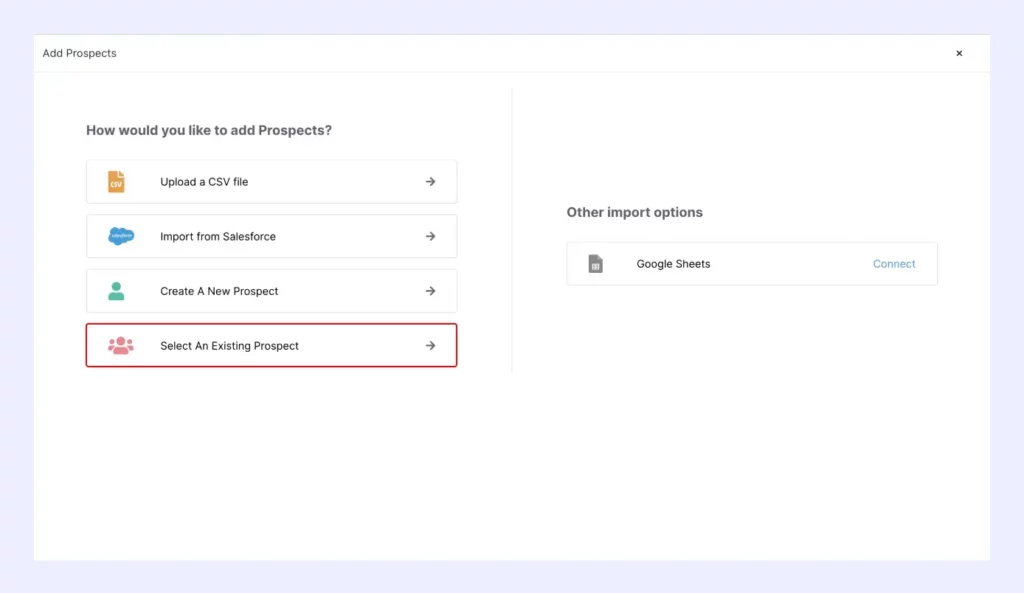
Choose the prospect list you want to import.
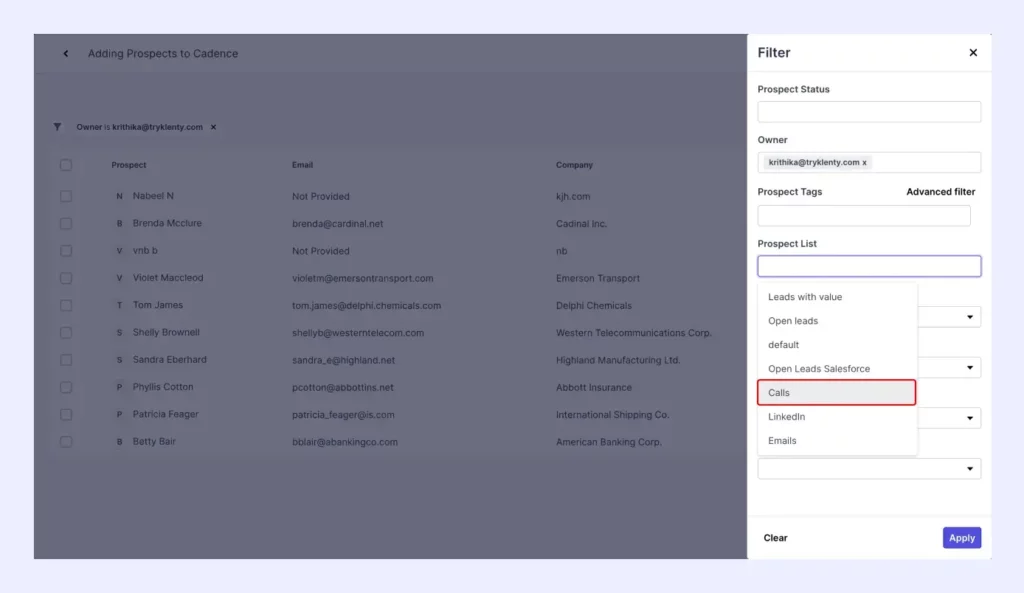
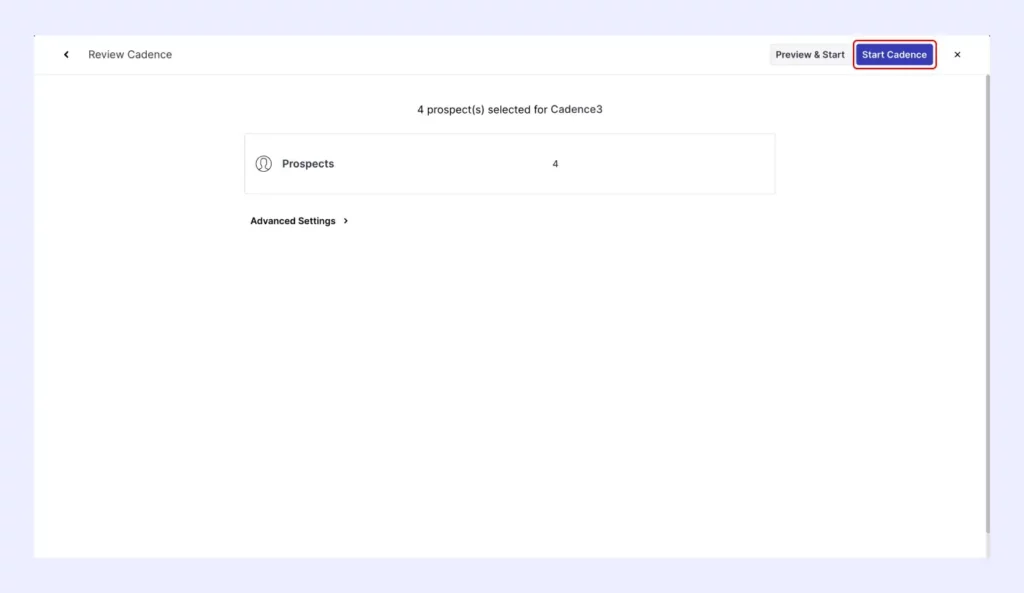
Take a final look and verify if all your prospects are selected.
Upon adding prospects into the cadence, start it to finish all your call tasks!
iii) Run Automated Email Sequences to your Leads
Following your importing of leads into Klenty, you now have to contact them.
For sales teams running email-heavy sequences, here’s how you can maximize them!
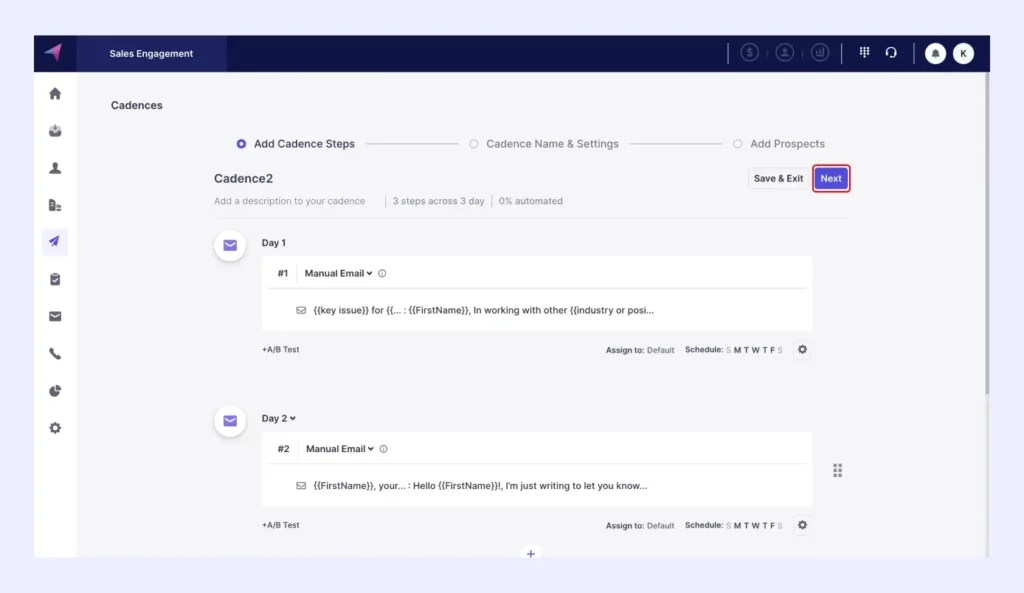
Here’s how you create an email cadence in Klenty.
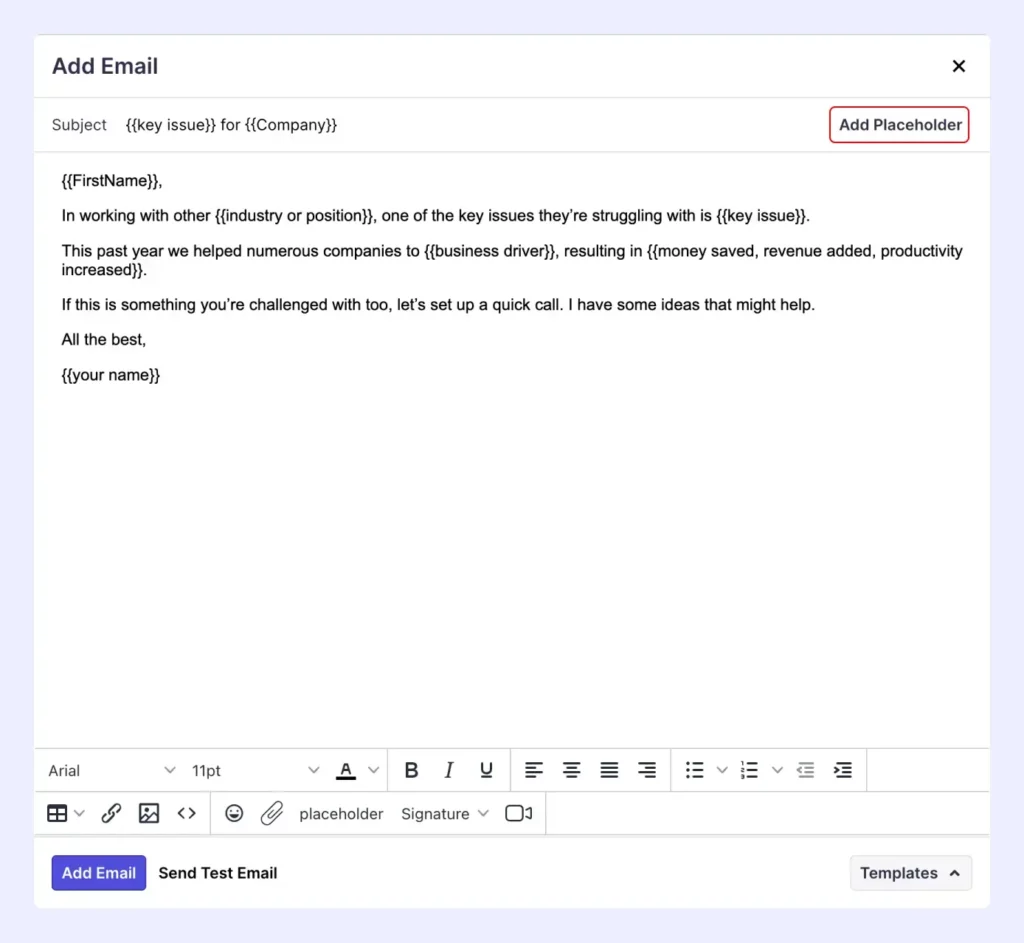
Add an email step
Use an existing template or write your own email.
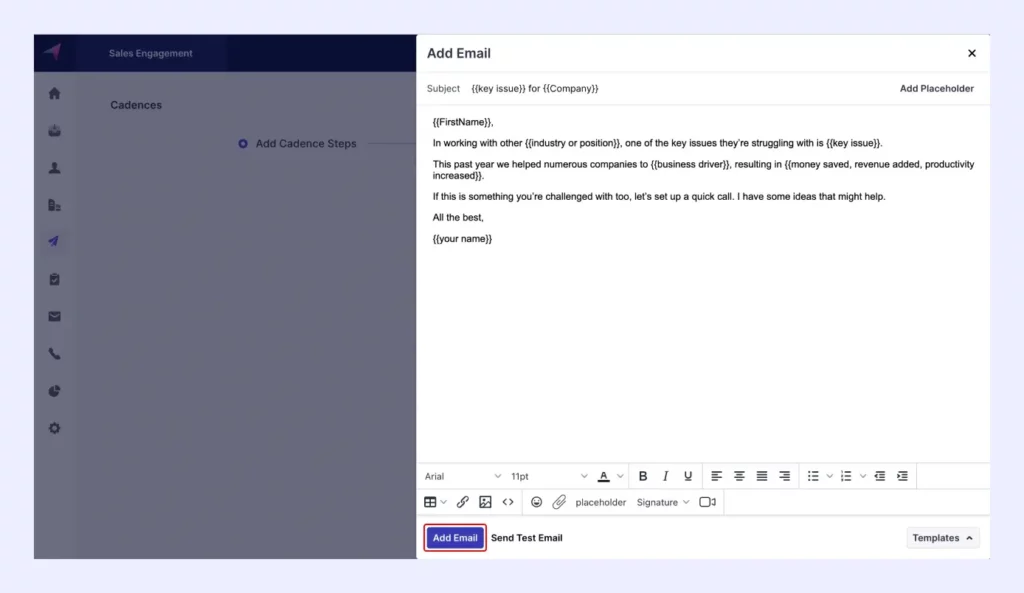
Now, repeat this till you reach the number of email steps you desire.
Let’s now add prospects into this cadence.
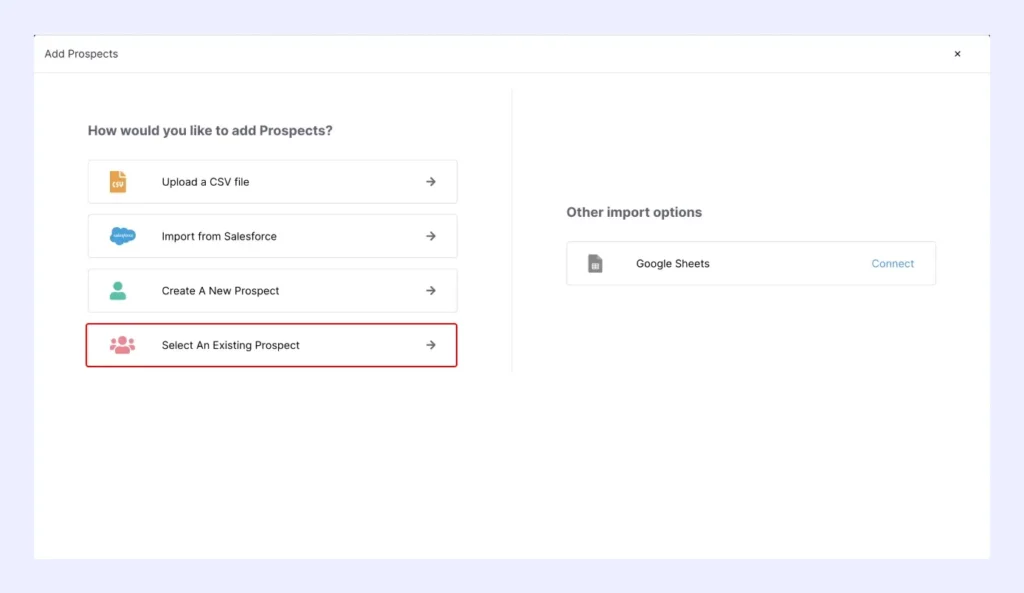
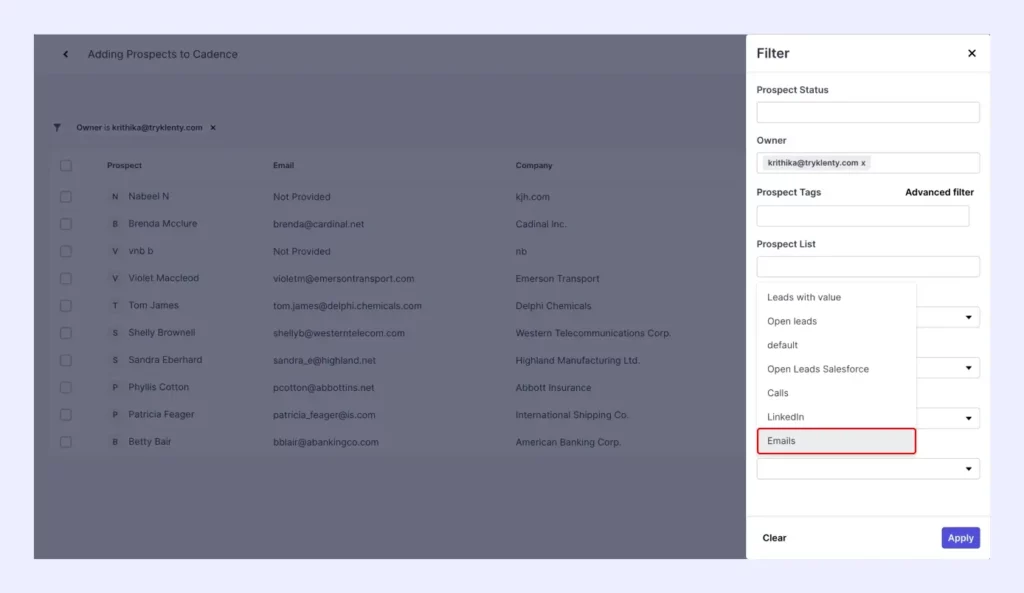
You have to filter out the list you wish to add to the cadence.
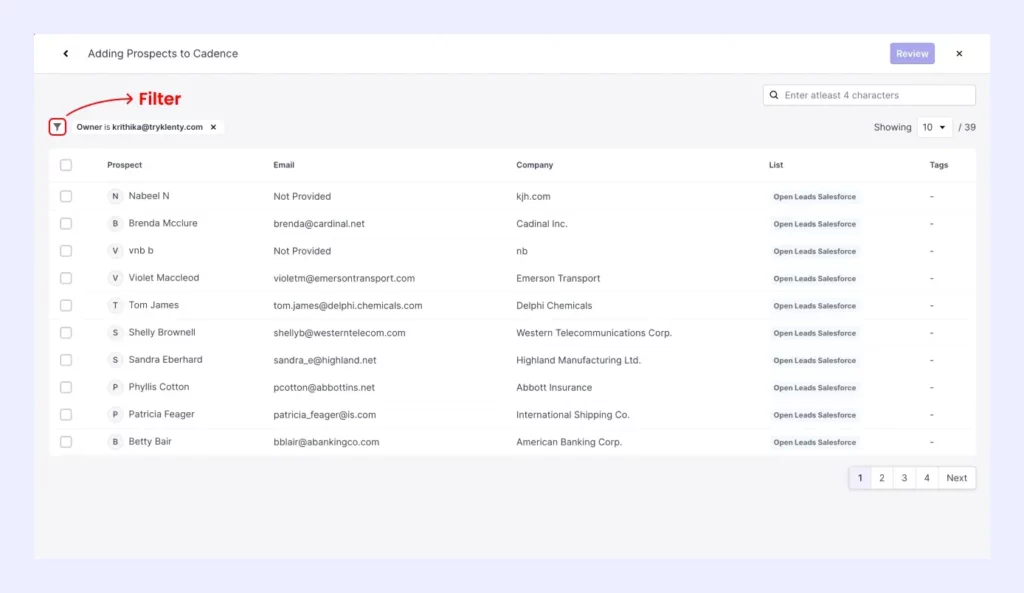
Select the prospect list you want to import.
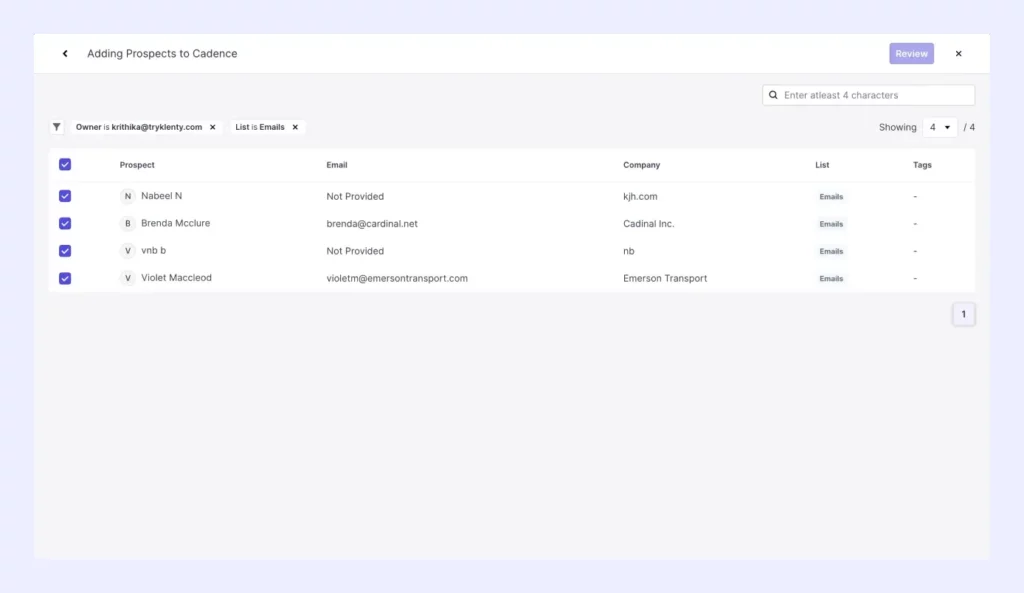
Verify if all your prospects are selected.
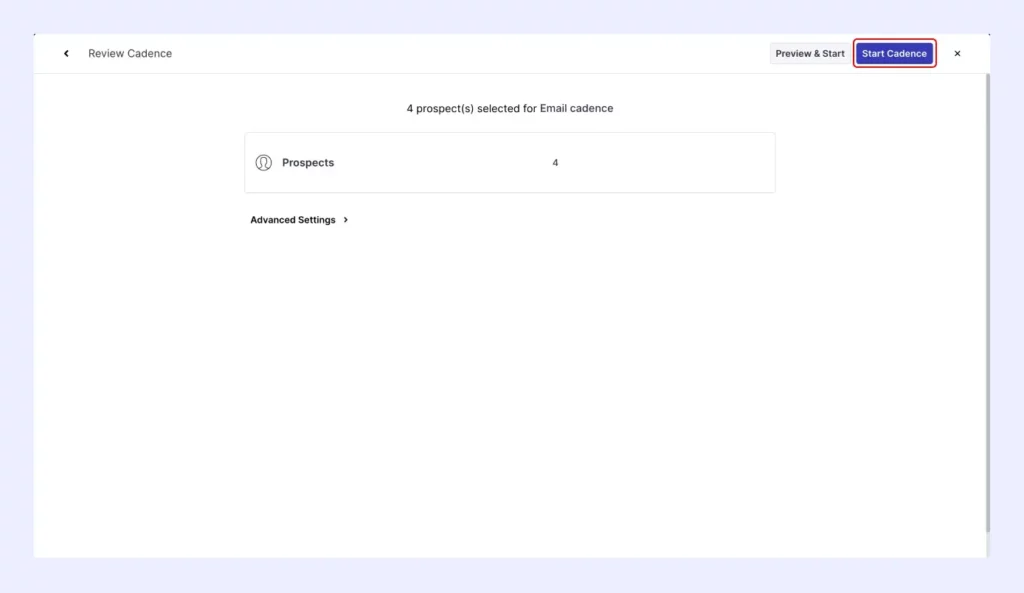
Upon confirming, start your cadence to complete your email tasks.
iv) Combine Multiple Channels Into a Single Sequence
We’ve now explored creating separate emails, calls, and LinkedIn sequences.
You can combine all these to create one multi-channel sequence.
Your sequence will look something like this.

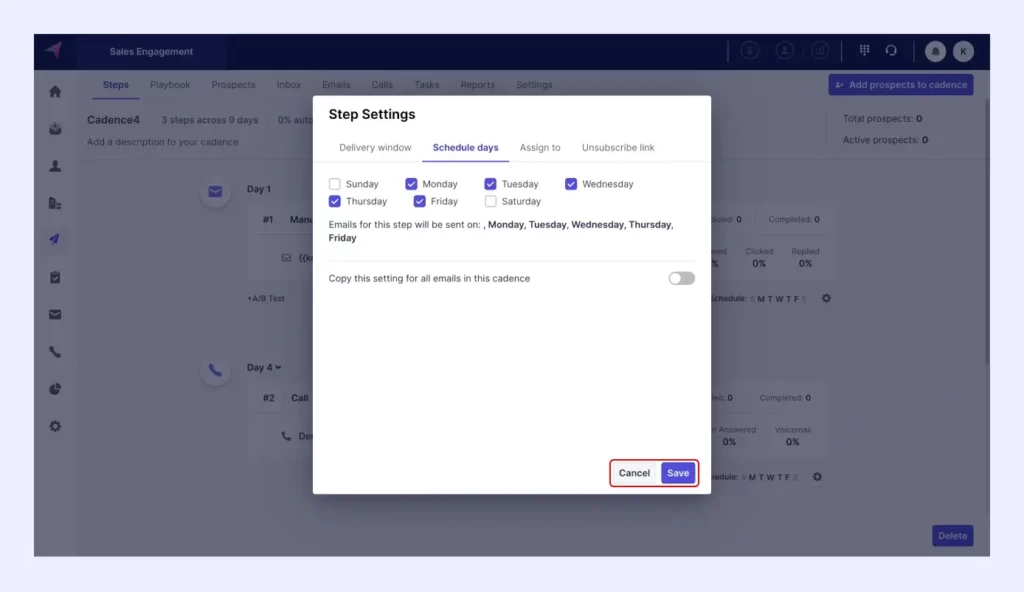
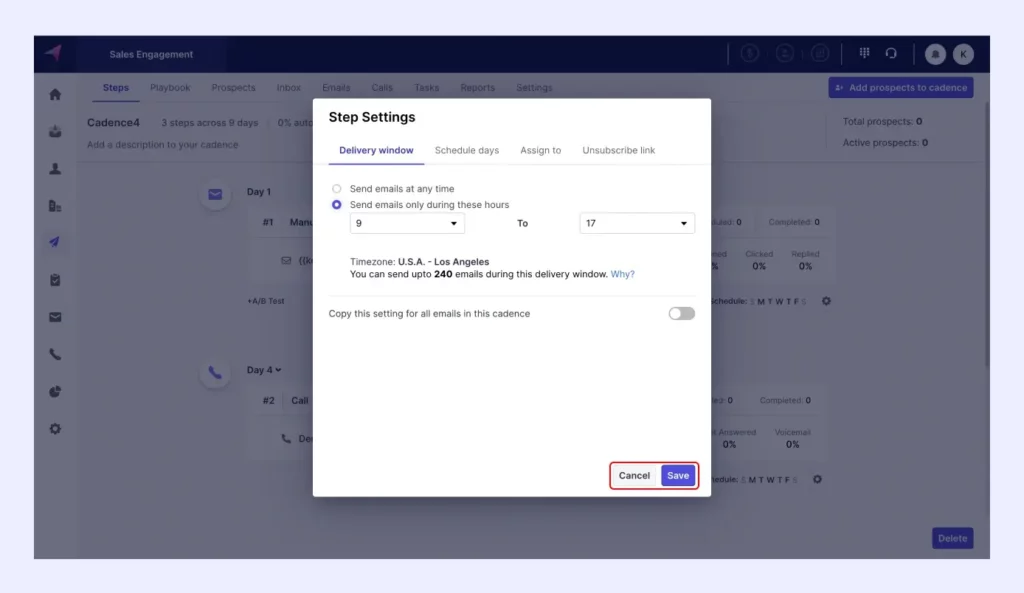
You can adjust your outreach based on date and time, as well.
Personalize at Scale Using the Data You Have in Your CRM
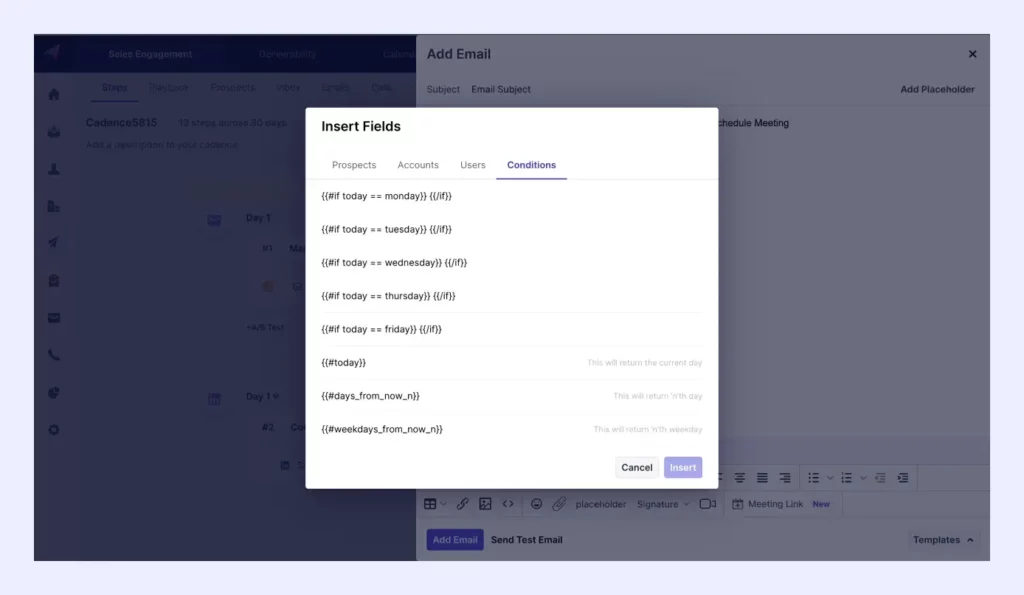
Using the lead information your mapped to Klenty previously, you can now personalize your every touch point. Be it, first name, role, company, or region.
You can even set your own custom fields!
Use dynamic formulas to customize emails based on date and time.
Customize Outreach Based on Intent Stages
Now that your cadences are up and running, your prospects will be engaging with you. But, you’ll notice they’ll show varying levels of interaction. After all, no two leads are alike.
Consider these 2 scenarios:
- Jack always reads emails and clicks 1 or 2 links.
- Jill doesn’t engage with your outreach at all. She completely ghosts you all the time.
The set of activities that would work for Jack wouldn’t apply to Jill, because they are in different stages of the buying journey.
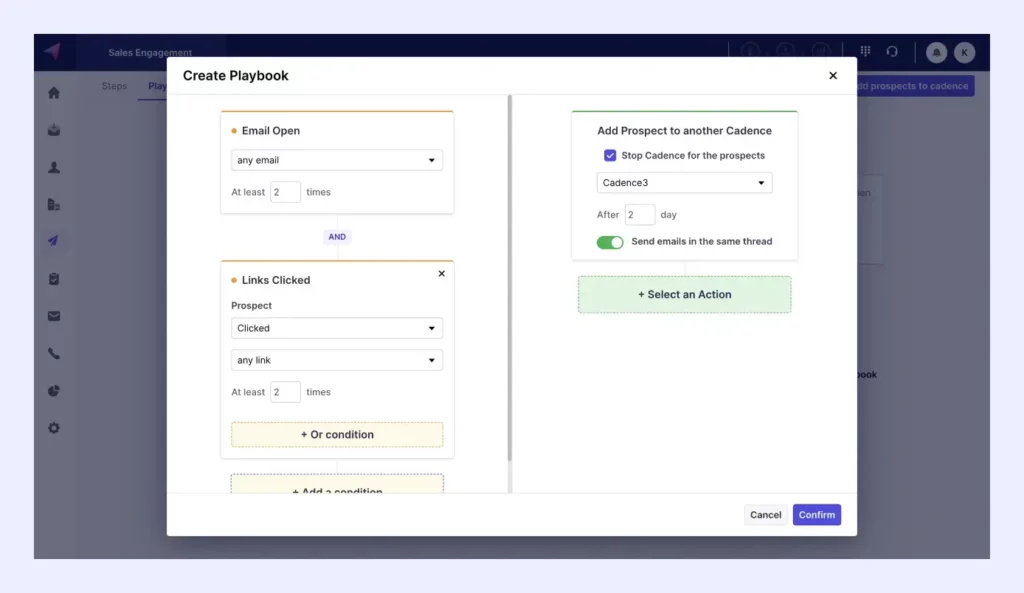
Klenty detects this buying intent and triggers specific and relevant sequences for prospects — based on their engagement with your outreach.
This is just one scenario.
Klenty offers a myriad of workflows like this that you can customize based on your preferences.
Run Specific Outreach for Leads Based on the Deal Stage in the CRM
Klenty detects when a deal moves to the next stage in your CRM and triggers a specific sequence for them.
This deal moved from Prospecting to Qualification.
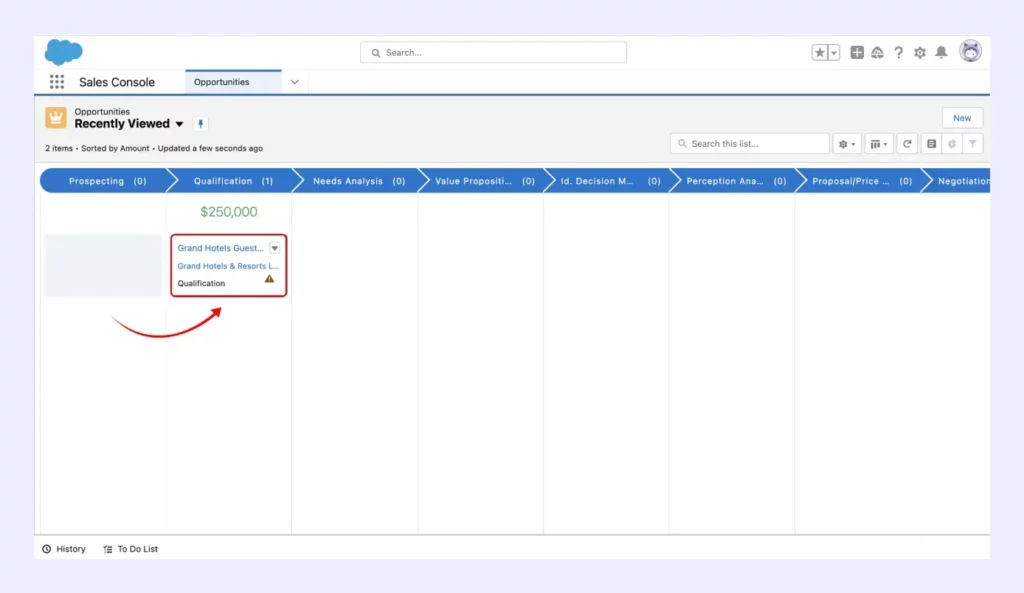
In Klenty, you can set up a Cadence Playbook to trigger a specific cadence for this scenario.

Now, every time a deal moves to Qualification stage, Klenty will activate the specified cadence for them automatically.
Execute Outreach Without Leaving CRM
If you’re a rep that loves working out of the CRM, Klenty can help you with that also.
Klenty’s plugin can be employed within your CRM. And you can execute all your tasks without leaving your CRM.
Klenty detects the leads you have in your CRM. You can select them and add them to a cadence of your choice.